Wednesday, January 27, 2010
Rustic (No-Knead) Bread
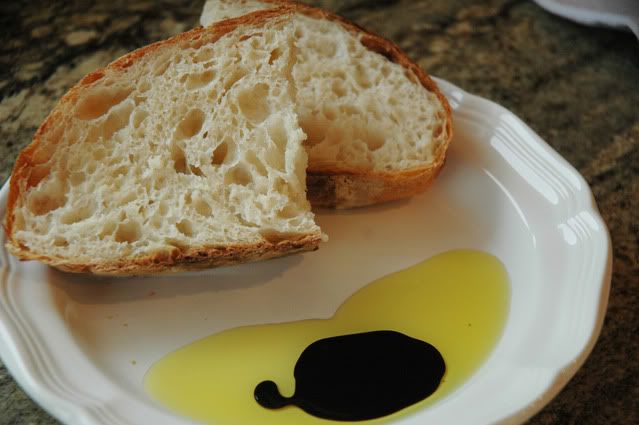
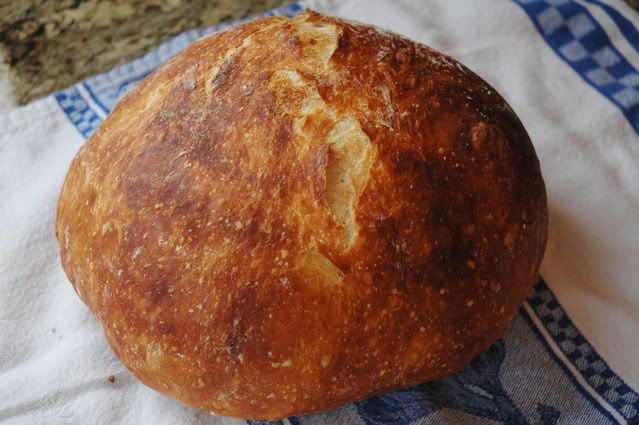
I am soooooooooo happy I came upon this recipe! Crispy crust, soft and chewy inside. Perfect with olive oil and balsamic vinegar! And it is so easy you won't even believe it! The hardest part is that you have to plan ahead a little because the dough needs to sit out 12-18 hours before you bake it. So you can't think about making it only a few hours before dinner time. But the early preparation is so worth it! And like the title says, there is NO kneading involved. No bread mixer, nothing. Just 4 ingredients, a bowl, a spoon, and a cast iron dutch oven to bake it in. This is seriously easy, and fun. And also impressive.
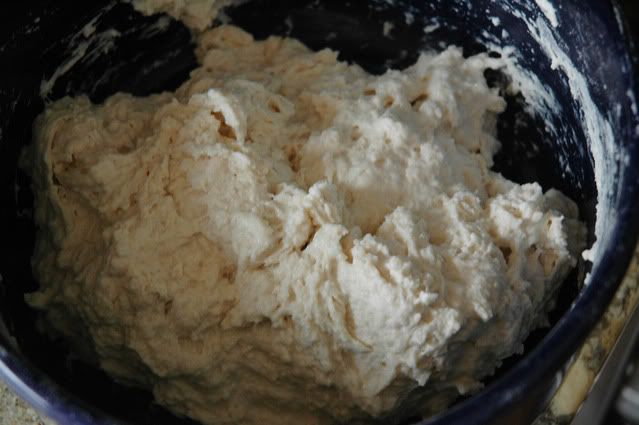
So here's how you make it. First, combine all ingredients into a bowl and mix with a spoon until the flour has been absorbed. Don't worry if it is all lumpy and doesn't look like bread dough.
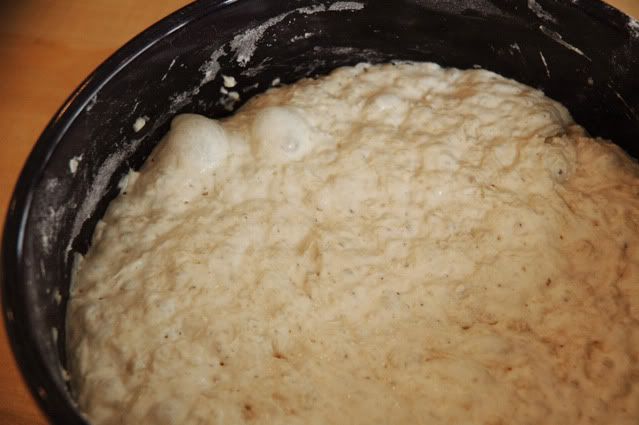
Then you cover it with foil or plastic wrap and leave it sitting out at room temperature for 12-18 hours (mine sat out closer to 24 hours). It should look all bubbly and gooey, like this.
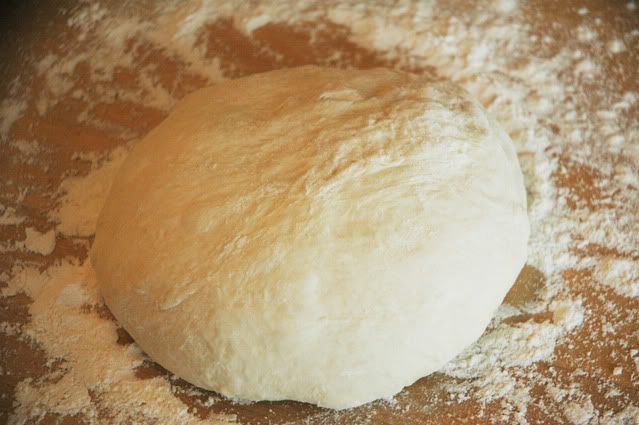
Then you scoop out the gooey dough onto a well floured suface, then sprinkle flour on top as well. Gently fold in the sides and form it into a ball. DON'T knead it and don't work the flour into the dough. The flour just stays on the outside to prevent it from sticking to your countertop.
Then cover it with a towel and let it rise 1-2 hours. 30 minutes before you are ready to bake it, preheat your oven to 450 and put your dutch oven pot (with lid) into the oven for 30 minutes to get it nice and hot. Take out your HOT pot and place dough ball inside it. There is no need to grease your pan! Cook for 30 minutes, then take off lid and continue cooking until browned. It comes out as a perfectly round yummy loaf!!!
Here's the recipe:
Rustic (No-Knead) Bread
Ingredients:
• 3 C Flour
• ½ tsp. Yeast
• 1 ¾ tsp. Salt
• 1 ½ C. Water
Method:
In a large mixing bowl, combine dry ingredients. Add water and mix with a spoon. There is no need to beat this, just get all of the flour absorbed. (You might need a little extra water if it’s very dry where you are. I used 1 2/3 cup water). Cover with plastic wrap or foil and let sit at room temperature (about 70 degrees) for 12-18 hours (mine sat out about 24 hours). The surface of the dough should then be dotted with bubbles. You can choose to stir the dough down and have it rise again if you need to delay the baking process, up to 24 hours or more, especially if you like more of a sourdough taste.
Dump your dough out onto a well floured surface. It will be very sticky. Sprinkle flour on top and gently shape into a ball (no kneading!) using just enough flour to prevent sticking to the counter. Cover with a towel and let it rise for 1-2 hours (the first time I made this I let it sit for only 30 minutes and it turned out just fine!).
At least 30 minutes before the dough is ready, put a 2 3/4-quart cast-iron pot with the lid in the oven and preheat the oven to 450°F. (I used a Le Creuset dutch oven and mine is 5 1/2-quart). After 30 minutes, remove pot from oven (being very careful because it will be extremely HOT!) Place the ball of dough into the pot. There is no need to grease the pot!
Cover with lid and bake at 450 for 30 minutes. Then remove the lid and continue baking until the loaf is browned, about 15-30 more minutes, depending on your oven. (note: the first time I made this bread I only baked it for 30 minutes with the lid on. I didn't read the directions to cook it longer until it browned. However, that loaf, in my opinion, was perfectly brown enough. This loaf in the picture I cooked for an additional 6 minutes and I felt it was starting to burn so I took it out of the oven. I guess it just depends on your oven)
Transfer the pot to a wire rack and let cool for 10 minutes. Using oven mitts, turn the pot on its side and gently turn the bread; it will release easily. Makes one 1 1/2-lb. loaf.
You can add other ingredients to make this an artisan-type bread. The possibilities are endless!
(blueberries, lemon zest, cranberries, orange zest, roasted garlic, asiago cheese, rosemary and other fresh herbs, sun-dried tomatoes, chopped olives—I can’t wait to try out different ingredients)
Thursday, January 21, 2010
Hot Fudge Sauce
I got this recipe from my mom. I love this hot fudge sauce because it has such a deep, rich chocolate flavor. It doesn't just taste like melted chocolate chips. I can eat this by the spoonful right from the refrigerator it is sooooooooooo good! That's why I have to limit myself as to how often I can make this.
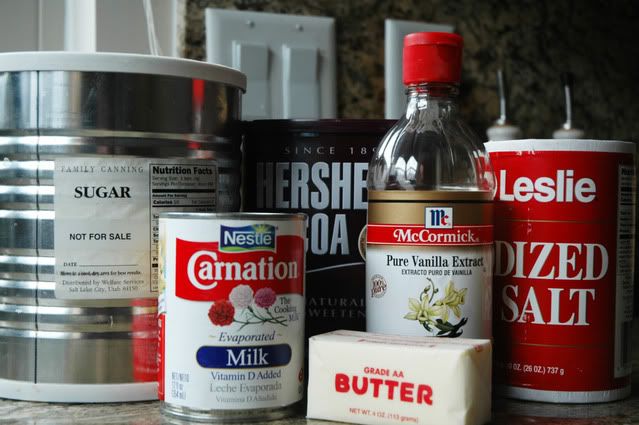
Here's what you need:
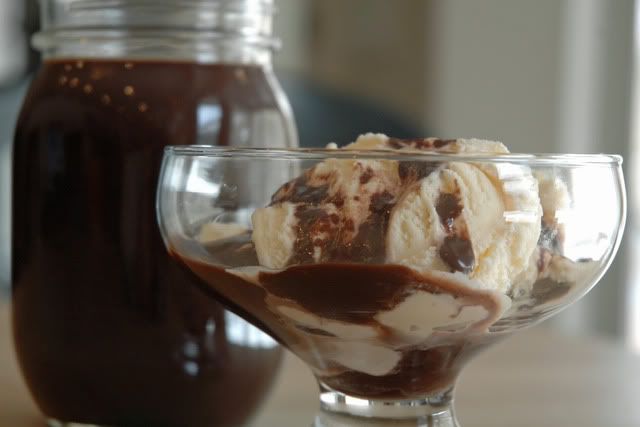
And here's the yummy final result!
Hot Fudge Sauce
print this recipe
½ cup butter
¾ cup cocoa
2 cups sugar
1 can evaporated milk
¼ tsp. salt
1 ½ tsp. vanilla
In medium saucepan, melt butter. Stir in cocoa, mix well (I use a wire wisk). Add sugar, milk, salt and vanilla. Stir on medium heat until it starts to boil. Turn heat to low, simmer 10 minutes to thicken, stirring occasionally. Make sure everything is dissolved and smooth.
Wednesday, January 20, 2010
In My Kitchen
I have been trying to oganize my recipes, thanks to this post. I love to cook and I LOVE finding GOOD, YUMMY recipes. As I go through the many many recipes I have collected but never tried, I will share the good ones on this blog. I will also be sharing the oldies but goodies--recipes that are my favorites but that aren't necessarily new. I might also share with you what I am eating (but only if it's good, of course) that may not have any recipe at all. Anything goes for this blog as long as it takes place in my kitchen!!!
Subscribe to:
Comments (Atom)
